
Apple Cider Cream Tart: A Seasonal Delight
As the leaves turn golden and the air becomes crisp, the allure of apple-based desserts rises to the forefront of autumn culinary traditions. From warm apple pies to spiced cider, the flavors of fall invite us to embrace the bounty of the harvest season. One standout dessert that embodies this seasonal charm is the Apple Cider Cream Tart. This delightful twist on traditional tarts brings together the rich flavors of spiced apples and creamy fillings, making it a perfect centerpiece for any autumn gathering or festive occasion.
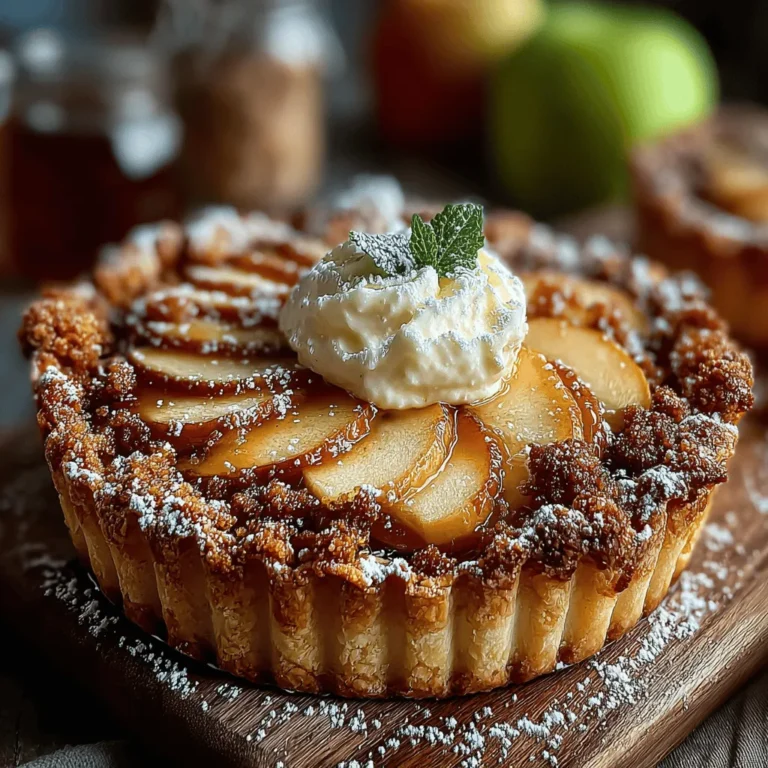
The Apple Cider Cream Tart is a harmonious blend of textures and tastes. With its buttery, flaky crust cradling a luscious filling made from concentrated apple cider, it captivates the palate and leaves a lasting impression. The creamy base, enhanced with hints of cinnamon and nutmeg, complements the tartness of the apples on top, creating a balance that appeals to both sweet and savory lovers alike. Whether served at a holiday feast or as a cozy dessert after a family dinner, this tart is sure to be a crowd-pleaser.
Understanding the Key Ingredients
To create a truly outstanding Apple Cider Cream Tart, it’s essential to understand the role of each ingredient in the recipe. The tart consists of three main components: the crust, the filling, and the topping. Each element contributes to the overall flavor and texture, making it crucial to choose high-quality ingredients.
1. The Crust: A great tart starts with a well-made crust. For the Apple Cider Cream Tart, a classic buttery pastry crust is used. The combination of flour, sugar, butter, and a touch of salt creates a base that is both tender and flaky. The key to achieving this texture lies in the temperature of the butter—using chilled butter ensures that it remains solid during the mixing process, leading to a flaky result once baked.
2. The Filling: The filling is where the magic truly happens. The star ingredient, apple cider, plays a pivotal role in developing the tart’s unique flavor profile. By reducing the cider, we concentrate its natural sweetness and rich apple essence, which forms the backbone of the filling. Additionally, the incorporation of heavy cream and eggs helps to create a smooth, custard-like consistency that is both creamy and satisfying.
3. The Topping: Traditionally, the Apple Cider Cream Tart is topped with fresh, sliced apples. This not only adds a beautiful visual element but also introduces a fresh, fruity contrast to the rich filling. The apples can be tossed with a sprinkle of cinnamon or sugar to enhance their flavor, creating a delightful balance between the tartness of the fruit and the sweetness of the cream.
Creating the Perfect Tart Crust
Now that we understand the components of the Apple Cider Cream Tart, let’s dive into the first crucial step: creating the perfect tart crust. A well-prepared crust is essential for the success of any tart, and this recipe is no exception.
Step 1: Preparing the Ingredients
Begin by gathering your ingredients. You’ll need all-purpose flour, unsalted butter, granulated sugar, salt, and ice water. Make sure your butter is chilled, as it will be cut into the flour to create the desired texture.
Step 2: Mixing the Dough
Using a food processor makes the process of preparing the crust quick and efficient. Start by combining the flour, sugar, and salt in the bowl of the food processor. Pulse the dry ingredients together until they are well mixed.
Next, cut the chilled butter into small cubes and add them to the flour mixture. Pulse the food processor until the mixture resembles coarse crumbs, with some pea-sized pieces of butter still visible. This step is crucial for achieving a flaky crust, as the bits of butter will create steam during baking, leading to a light and airy texture.
Step 3: Adding Cold Water
Once your mixture is ready, it’s time to add the cold water. Gradually drizzle in ice-cold water, pulsing the processor after each addition. Be cautious not to overmix; you want to combine the ingredients just until they come together. The dough should be slightly sticky but manageable.
Step 4: Shaping the Dough
Transfer the dough onto a lightly floured surface and shape it into a disk. Wrap it in plastic wrap and refrigerate for at least 30 minutes. Chilling the dough is vital, as it allows the gluten in the flour to relax, resulting in a tender crust.
Step 5: Rolling Out the Dough
After the dough has chilled, remove it from the refrigerator and place it on a floured surface. Using a rolling pin, roll the dough out into a circle that’s about 1/8 inch thick. Make sure to rotate the dough frequently to prevent sticking and to maintain an even thickness.
Once rolled out, carefully transfer the dough to your tart pan. Gently press the dough into the corners of the pan, taking care not to stretch it. If any cracks form, simply patch them up with excess dough.
Step 6: Pre-Baking the Crust
Pre-baking, or blind baking, the crust is an essential step in ensuring a perfectly baked tart. To do this, line the crust with parchment paper and fill it with pie weights or dried beans. This prevents the crust from puffing up while baking.
Place the tart shell in a preheated oven and bake it at 375°F (190°C) for about 15-20 minutes, or until the edges are lightly golden. After this initial baking time, remove the parchment and weights, and continue baking for an additional 5-10 minutes until the crust is fully set and golden brown. This pre-baking step is crucial to prevent a soggy bottom and enhances the flavor of the crust.
Crafting the Apple Cider Filling
With the crust pre-baked and ready to go, it’s time to focus on crafting the apple cider filling. This step is where the tart truly comes to life, and the flavors meld together beautifully.
Step 1: Reducing the Apple Cider
Start by pouring fresh apple cider into a saucepan and heating it over medium heat. Allow the cider to simmer until it reduces by about half, which will concentrate the flavors and intensify the sweetness. This process can take around 15-20 minutes, so be patient and stir occasionally to prevent it from burning.
Step 2: Balancing the Flavors
Once the cider has reduced, it’s time to enhance the flavor profile with spices. Add a pinch of cinnamon and nutmeg to the reduced cider, adjusting to your taste preference. These warm spices are essential for evoking the essence of fall and complementing the apple flavor beautifully.
Step 3: Mixing the Filling
In a separate bowl, whisk together the heavy cream and eggs until smooth. Slowly incorporate the reduced apple cider mixture into the egg and cream mixture, whisking continuously to prevent the eggs from scrambling. The goal is to achieve a smooth and creamy consistency that will set beautifully as it bakes.
Once your filling is ready, pour it into the prepared tart crust, filling it just below the rim to allow for expansion as it bakes.
With the crust prepared and the filling mixed, you’re well on your way to creating a stunning Apple Cider Cream Tart that will become a cherished recipe for years to come. Stay tuned as we explore the final steps of assembling and finishing this delightful dessert in the next part of our article.
Assembling the Tart
Once your apple cider cream filling is ready and your crust has been pre-baked to a golden perfection, it’s time to bring this tart together. Begin by pouring the delicious filling into the prepared tart crust. Use a spatula to spread the filling evenly, ensuring that it reaches the edges and is level across the surface.
Baking Tips
Baking the tart is a crucial step that requires attention to detail. Preheat your oven to the temperature specified in the recipe—typically around 350°F (175°C). Place the tart in the oven and set a timer for about 25 to 30 minutes, depending on your oven’s calibration.
To check for doneness, gently shake the tart after the timer goes off. The filling should be slightly jiggly in the center but firm enough that it doesn’t appear liquidy. A good indicator of doneness is when the edges are set, and the center retains a jiggle similar to a soft custard.
Timing is essential during the baking process. If left in the oven for too long, the filling may become overcooked, leading to a rubbery texture rather than the creamy consistency you desire. If you’re uncertain, it’s better to err on the side of underbaking slightly, as the tart will continue to set as it cools.
Topping the Tart with Fresh Apples
While the tart cools, it’s time to prepare your apple topping. Using fresh apples rather than cooked apples for the topping enhances the tart’s flavor and texture. Fresh apples provide a crisp bite that contrasts beautifully with the creamy filling.
Choosing the Right Apples
For the best results, opt for apples that balance sweetness and tartness. Gala and Honeycrisp are two excellent choices. Gala apples are sweet and juicy, while Honeycrisp apples offer a delightful crunch and a hint of tartness.
Preparing the Apple Slices
To prepare the apple slices, start by washing the apples thoroughly. Core and slice the apples thinly to achieve an appealing presentation. Aim for slices that are about 1/8 inch thick; this thickness allows for easy layering without overwhelming the tart.
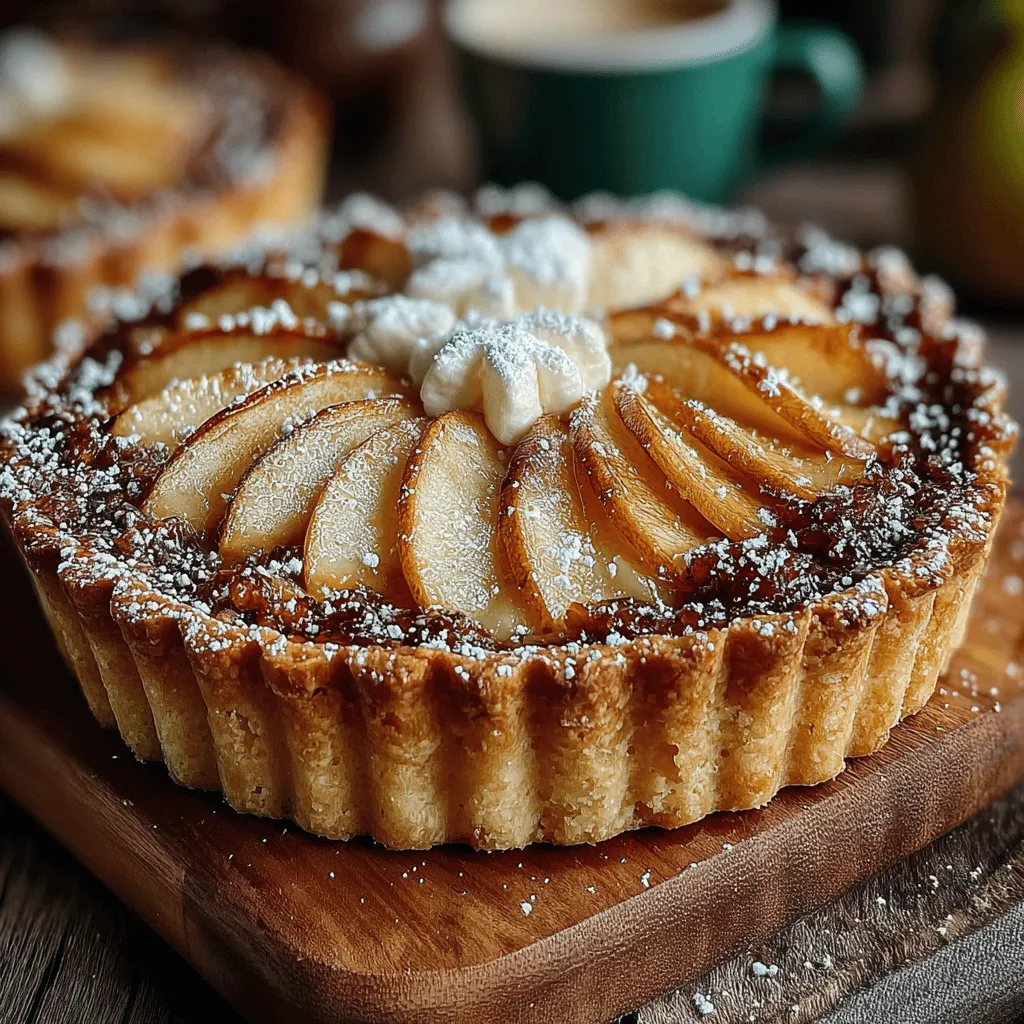
Arranging the Apple Slices
Artfully arranging the apple slices on top of the tart can elevate its appearance significantly. Start from the outer edge and work your way in, overlapping the slices slightly as you go. This technique not only creates a beautiful pattern but also ensures that each slice is visible, showcasing the colors and textures of the apples. For an added touch, consider sprinkling a bit of cinnamon or sugar over the apple slices before serving to enhance their flavor.
Cooling and Presentation
Allowing the tart to cool completely is vital for achieving clean slices. After removing the tart from the oven, let it cool at room temperature for at least one hour before transferring it to the refrigerator. Cooling helps the filling set properly, making it easier to slice without compromising the tart’s structure.
Dusting for Elegance
For an elegant finish, dust the top of the tart with powdered sugar before serving. This simple addition not only enhances the tart’s visual appeal but also adds a touch of sweetness that complements the tartness of the apples.
Serving Suggestions
When it comes to serving the Apple Cider Cream Tart, consider pairing it with a dollop of freshly whipped cream or a scoop of vanilla ice cream. The creaminess of the toppings contrasts beautifully with the tart filling, creating a luxurious dessert experience. For some added flair, consider drizzling caramel sauce over the top or serving it alongside spiced cider for a cozy autumnal treat.
Nutritional Information and Serving Suggestions
Understanding the nutritional aspects of your dessert can enhance your enjoyment of it. A standard serving of Apple Cider Cream Tart typically contains around 300 calories, depending on the portion size and specific ingredients used. This dessert is rich in flavor but also provides a satisfying balance of creaminess and fruitiness.
Serving Occasions
This tart is versatile enough to shine at various occasions, from holiday gatherings to casual family dinners. Its beautiful presentation makes it an excellent centerpiece dessert for Thanksgiving or Christmas celebrations. Additionally, it can be a comforting dessert choice for cozy evenings spent at home, providing warmth and nostalgia with every bite.
Conclusion
The Apple Cider Cream Tart is more than just a dessert; it’s a celebration of seasonal flavors harmoniously blended into an elegant presentation. Its creamy filling, fresh apple topping, and buttery crust create a delightful harmony that is sure to please your palate and warm your heart.
As you embark on your journey to create this tart, remember that it is accessible for bakers of all levels. Whether you’re a seasoned chef or a novice in the kitchen, this recipe invites you to explore the joys of baking.
Nothing compares to the satisfaction of sharing homemade desserts with family and friends. The warmth and comfort they bring create lasting memories, making every gathering special. So gather your ingredients, roll up your sleeves, and enjoy the process of creating this delightful Apple Cider Cream Tart. Your loved ones will surely appreciate the effort, and you’ll find joy in each delicious slice.
